
Manager Reviewer Campaign
Creating a Campaign Targeting a Specific App and Manager Reviewer
Section titled “Creating a Campaign Targeting a Specific App and Manager Reviewer”This guide walks you through creating a new campaign that targets a specific application and assigns the user’s manager as the reviewer.
Step 1–3 – Create Campaign and Add Details
Section titled “Step 1–3 – Create Campaign and Add Details”1. Open the Campaigns Page
Section titled “1. Open the Campaigns Page”- From the left-hand menu, click Campaigns.
- Click Create Campaign.
2. Enter Campaign Details
Section titled “2. Enter Campaign Details”- In the Create Campaign window, type a Campaign Name (for example,
Test Campaign). - Confirm the Campaign Owner (it defaults to the currently logged-in user).
- Enter a short Description for the campaign.
3. Choose Manager Reviewer
Section titled “3. Choose Manager Reviewer”- Under the Review Strategy section, open the Reviewer Type dropdown.
- Select Manager (identity’s manager).
- The system will automatically assign each user’s direct manager as their reviewer.
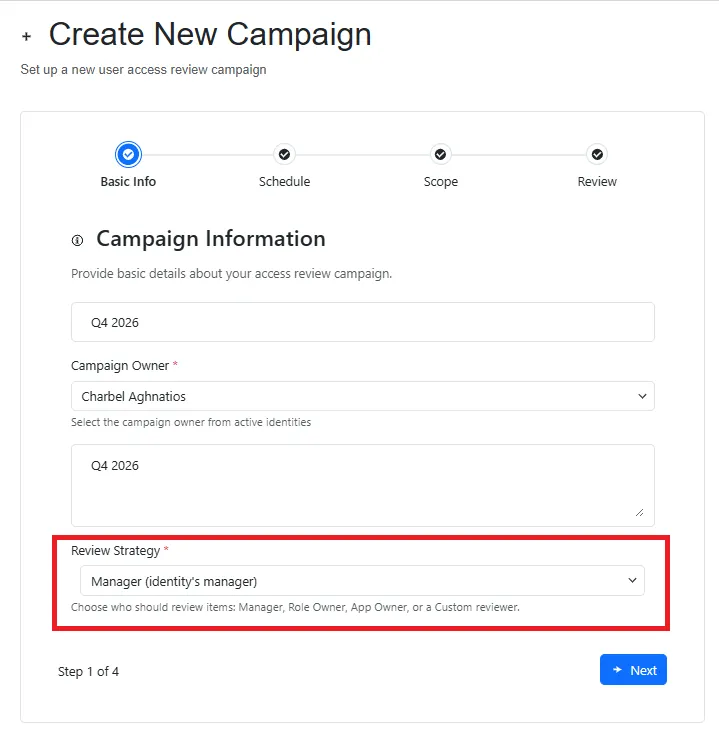
- Once selected, click Next.
Note: Users without an assigned manager in the system will need to have their review items reassigned manually.
Step 4 – Set Dates and Reminders
Section titled “Step 4 – Set Dates and Reminders”- Specify the Start Date and End Date.
- Adjust Reminder settings as needed.
- Click Next.
Step 5 – Define Campaign Scope
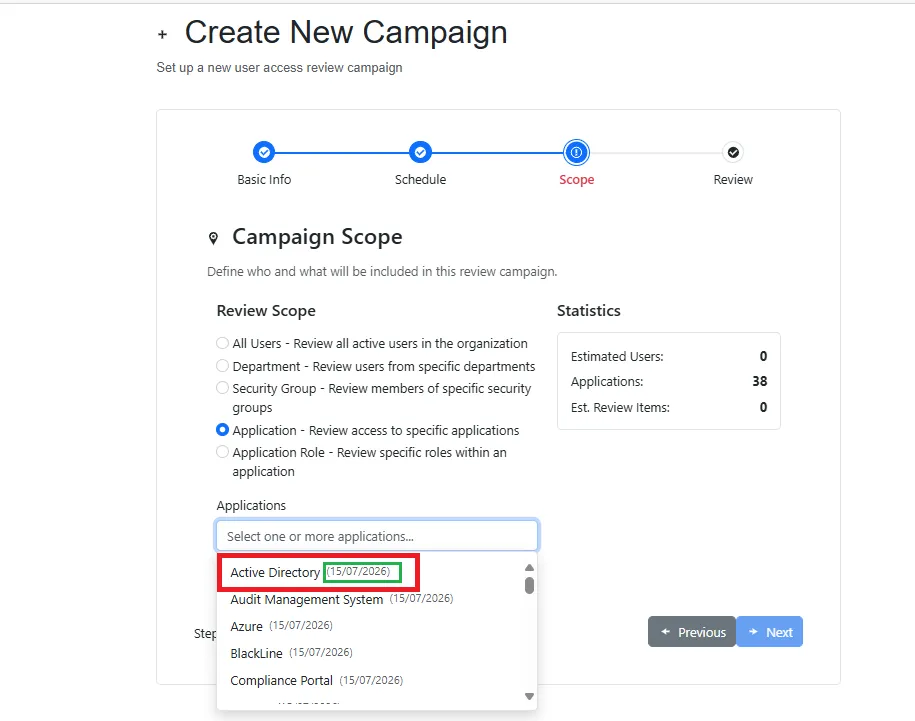
Section titled “Step 5 – Define Campaign Scope”- Under Campaign Scope, choose
”Review access to specific applications.” - In the Application field, select one or more applications to include. Note that the application last sync is displayed
- Click Next.
Step 6 – Review and Create
Section titled “Step 6 – Review and Create”- Review the Campaign Summary to confirm all details.
- Click the Create Campaign (green) button.
Step 7 – Confirmation
Section titled “Step 7 – Confirmation”Your new campaign is created successfully.
You’ll be automatically redirected to the newly created campaign’s page where you can view and manage it.
Tip: You can return to the Campaigns page at any time to monitor progress or edit campaign settings.