
Importing Application Data via CSV
Importing Application Data via CSV
Section titled “Importing Application Data via CSV”Step 1: Create or Select an Application
Section titled “Step 1: Create or Select an Application”To import user access data into an application, you first need to create an application if one doesn’t already exist.
Creating a New Application
Section titled “Creating a New Application”- Click on Create Application
- Fill in as many details as possible about the application
- The Application Name is the only required field
Once you create a new application, the CSV Import wizard will appear automatically.
Starting the CSV Import Wizard
Section titled “Starting the CSV Import Wizard”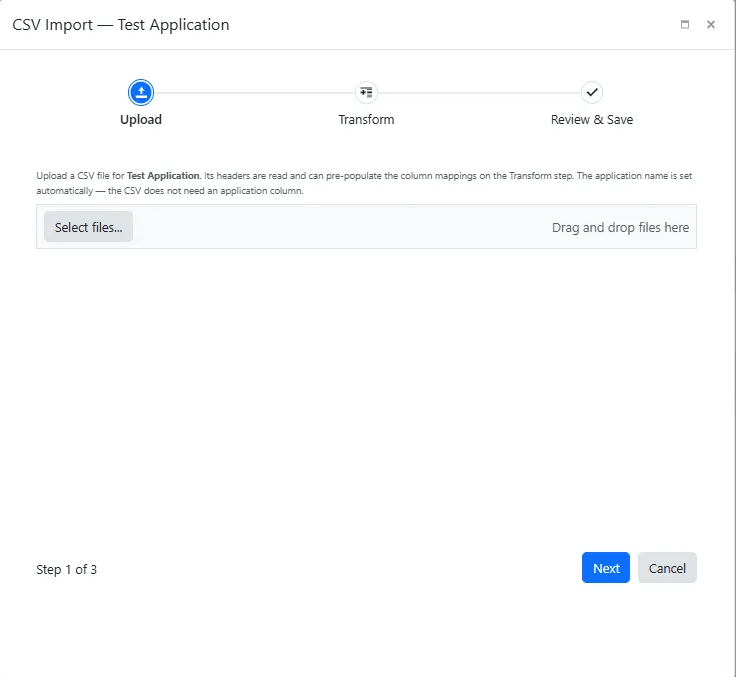
If you’re working with an existing application, click on the Import button to start the CSV import wizard.
Upload Your CSV File
Section titled “Upload Your CSV File”As part of Step 1, you will need to drag and drop your CSV file or browse to select it from your computer.
CSV File Selection
Section titled “CSV File Selection”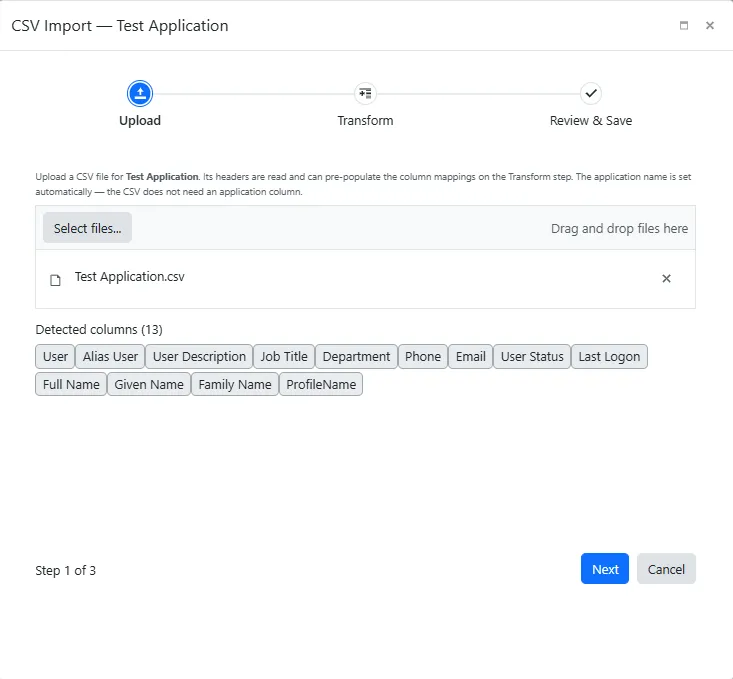
Step 2: Map Fields
Section titled “Step 2: Map Fields”In Step 2, you’ll map the columns from your CSV file to the corresponding fields in the application.
Field Mapping Guidelines
Section titled “Field Mapping Guidelines”- Map as many fields as possible - The more fields you map, the richer and more complete your data will be
- Required Field:
ExternalUserIdis the only required target field that must be mapped - Optional Settings: You can leave other settings at their default values or adjust them as necessary
The field mapping interface allows you to match each CSV column to the appropriate target field in the system.
Field Mapping Interface
Section titled “Field Mapping Interface”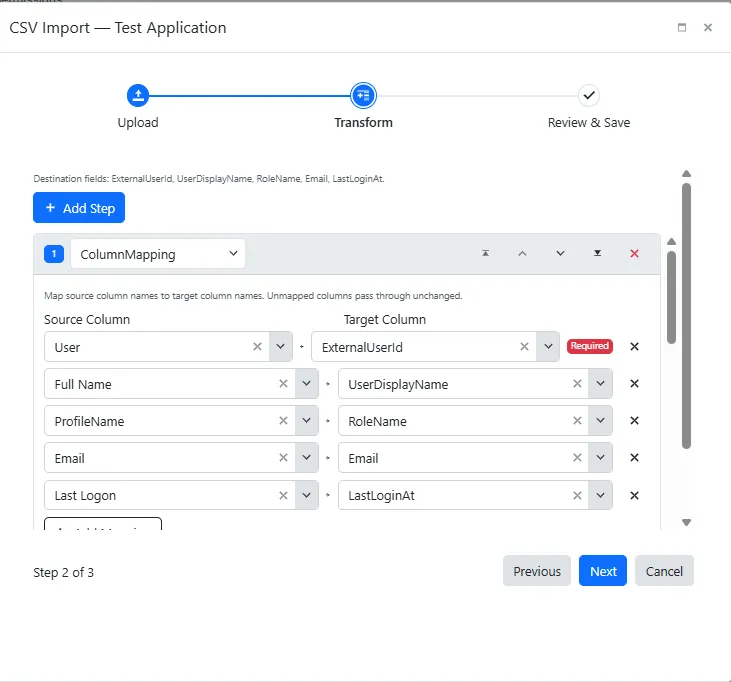
Step 3: Review and Load Data
Section titled “Step 3: Review and Load Data”In the final step, you’ll review the import results before committing the data.
Review Import Results
Section titled “Review Import Results”- Check for skipped rows - The system will identify any rows that were skipped during import
- Understand why rows were skipped - Common reasons include:
- Empty rows in the CSV file
- Missing required data
- Invalid data formats
In the example below, a row was skipped because it contained no data (an empty row in the CSV file). If you were to open the file in a text editor, the content of the row would just be commas: ",,,,,,,,,,,,"
Review Results - Skipped Rows
Section titled “Review Results - Skipped Rows”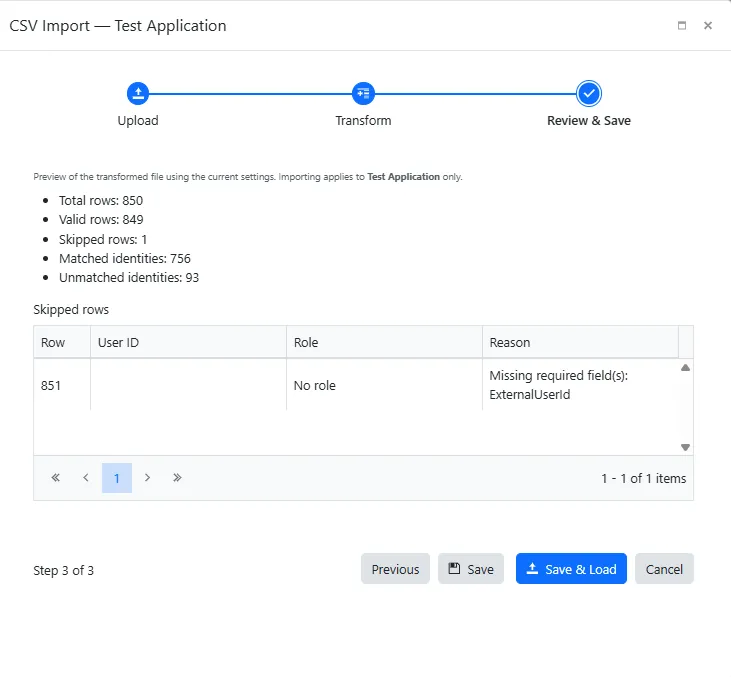
Making Corrections
Section titled “Making Corrections”If rows were skipped:
- Note which rows were skipped and why
- Make the necessary changes to your CSV file
- Restart the import process
Complete the Import
Section titled “Complete the Import”Once you are satisfied with the results and there are no errors (or only acceptable skipped rows):
- Click the Save & Load button to load the data into the application
- The system will process and import all valid rows
Successful Import Completion
Section titled “Successful Import Completion”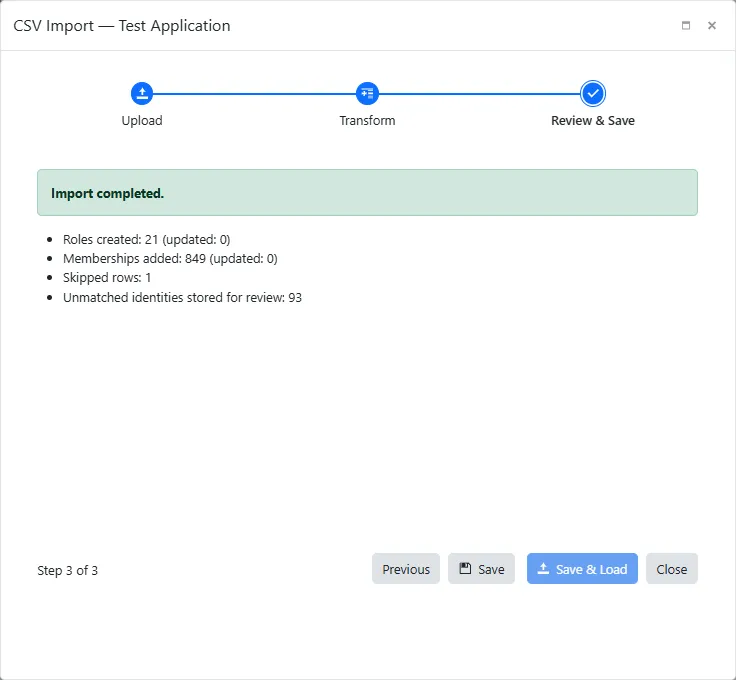
Viewing Imported Data
Section titled “Viewing Imported Data”After completing the import:
- Click Close to exit the import wizard
- Navigate to Application Actions and select Roles
- You will be able to see all the roles that were imported from your CSV file
The imported roles are now available in your application and can be used for access reviews and user management.