Azure Application Permission
Azure Application Permission
Section titled “Azure Application Permission”Step 1: Log in as Global Admin or Application Administrator
Section titled “Step 1: Log in as Global Admin or Application Administrator”Ensure you have Global Administrator or Application Administrator rights.
Step 2: Open the Admin Consent URL
Section titled “Step 2: Open the Admin Consent URL”We have provided you with a secure admin consent link for the application:
👉 https://companyname-uar.tikabu.io
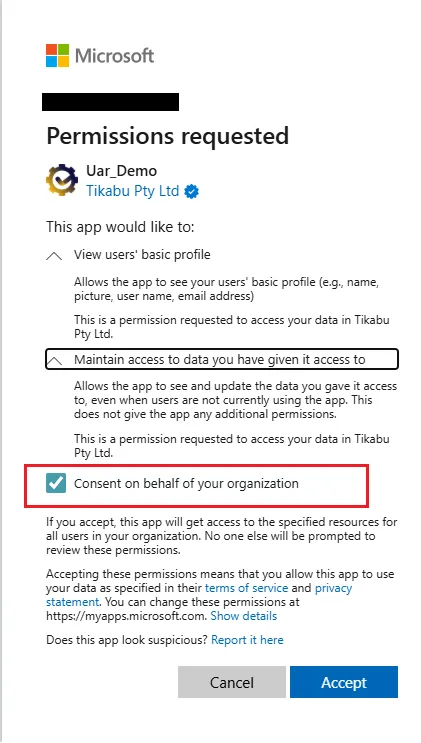
Clicking this link will:
- Open the Microsoft permissions request screen.
- Display the permissions that the application requires.
Step 3: Review and Grant Consent
Section titled “Step 3: Review and Grant Consent”- Review the listed permissions.
- Click Accept to grant consent on behalf of your organisation.
- Ensure that you check the option “Consent on behalf of your organisation” (if prompted).
Step 4: Assign Role (UARAdmin)
Section titled “Step 4: Assign Role (UARAdmin)”Once the application is approved, your Cyber Security users or groups need to be assigned to the elevant role (UARAdmin):
1. Create the Group (optional but recommended)
Section titled “1. Create the Group (optional but recommended)”-
Azure Portal → Microsoft Entra ID → Groups → + New group
-
Group type: Security (recommended)
-
Name: e.g.
UAR-Admins -
Members:
- Add the relevant users (e.g. User01 and User02) to
UAR-Admins.
- Add the relevant users (e.g. User01 and User02) to
-
Click Create.
2. Assign Groups to the App Role
Section titled “2. Assign Groups to the App Role”- Azure Portal → Microsoft Entra ID → Enterprise applications → All applications (Remove the “Application type==Enterprise Applications” filter if selected)
- Find and open UAR_CompanyName (this is the Enterprise Application / service principal created after consent).
- Go to Users and groups → + Add user/group.
- In the pane:
- Select the group (e.g.
UAR-Admins). - Under Select a role, choose
UARAdmin. - Click Assign.
- Select the group (e.g.
- Repeat for the other group/role.
3. Refresh User Sign-In
Section titled “3. Refresh User Sign-In”- Tell users to sign out and sign in again (or revoke and refresh tokens) so their new role is present in their access tokens.